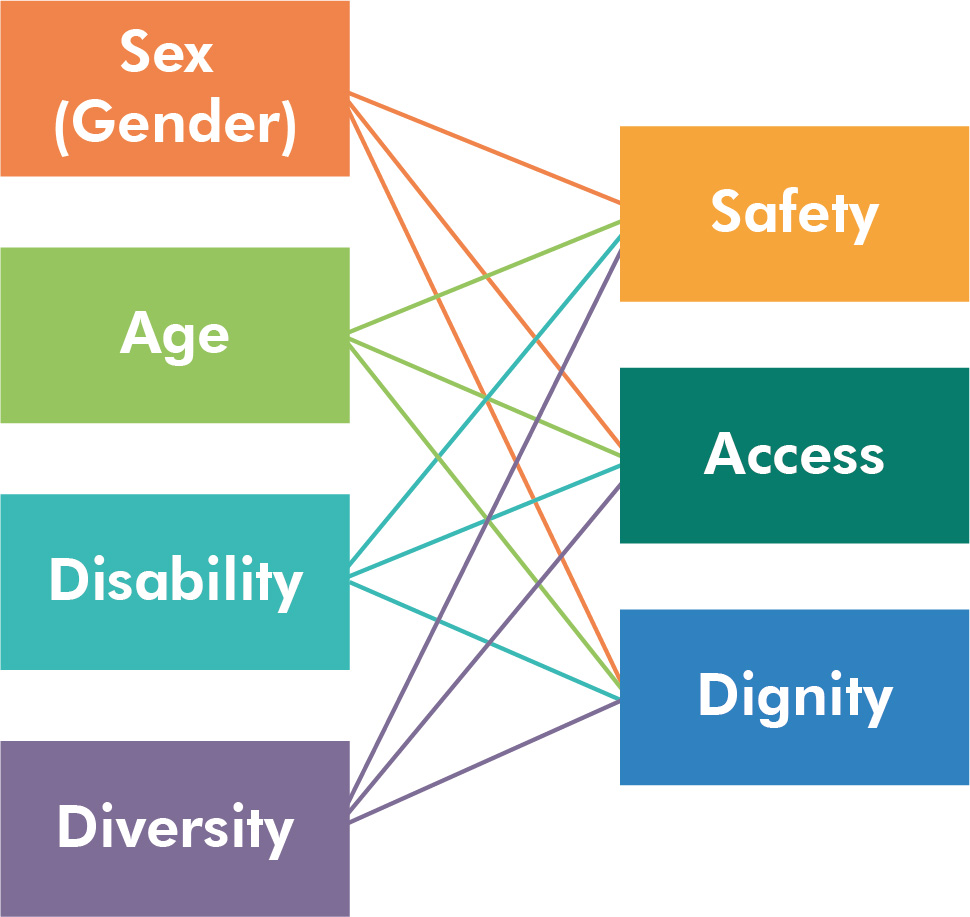
Home SADI – CAFOD’s safe, accessible, dignified and inclusive approach Figure-3-SAD-SADD-analysi... Figure-3-SAD-SADD-analysis